![One-to-One Video Call App iOS [Using Agora SDK]](https://cdn.hashnode.com/res/hashnode/image/upload/v1627250341502/3fo2yxQt5.png?w=1600&h=840&fit=crop&crop=entropy&auto=compress,format&format=webp)


Since the COVID-19 crisis ⚠️ around the world, video conference / video chat have been an important thing for us so we are going to build one-to-one video call application using Agora SDK.
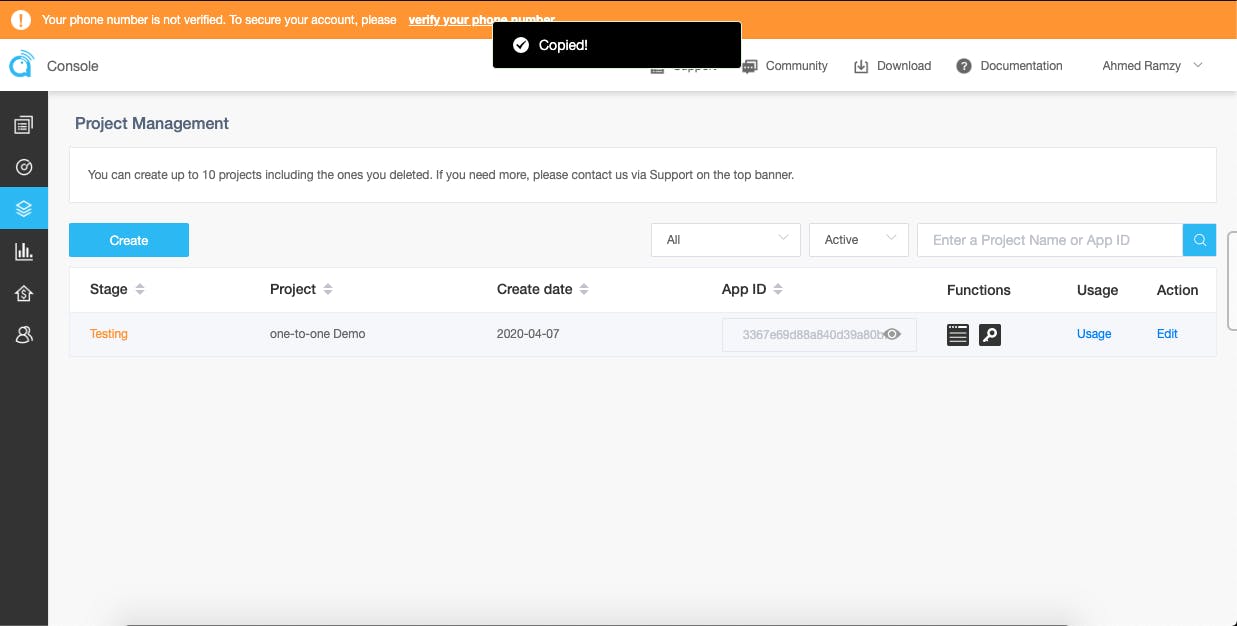
after you create an account and login on agora website , you will find an overview for all of your projects on the website .. so navigate to project management through the side menu.

now we press on create project button:

we enter the project name and select APP ID + APP Certificate + Token for the Authentication Mechanism.
you will find your project in the projects list now copy your App ID and save it we will use it later 💾.
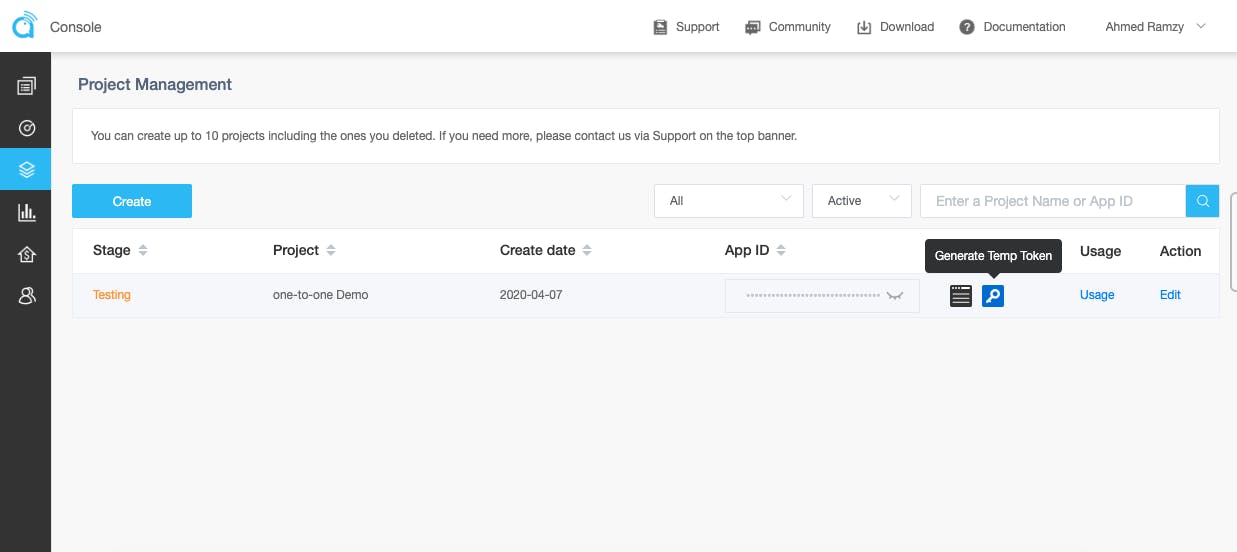
now click on the key(Token) in the functions column to generate temporary token :
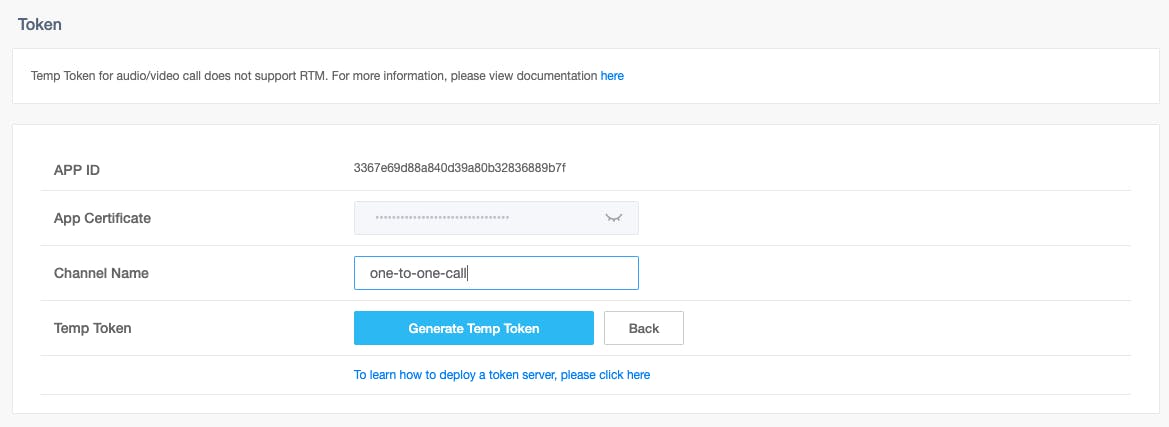
Enter the channel name and then hit Generate Temp Token Button.
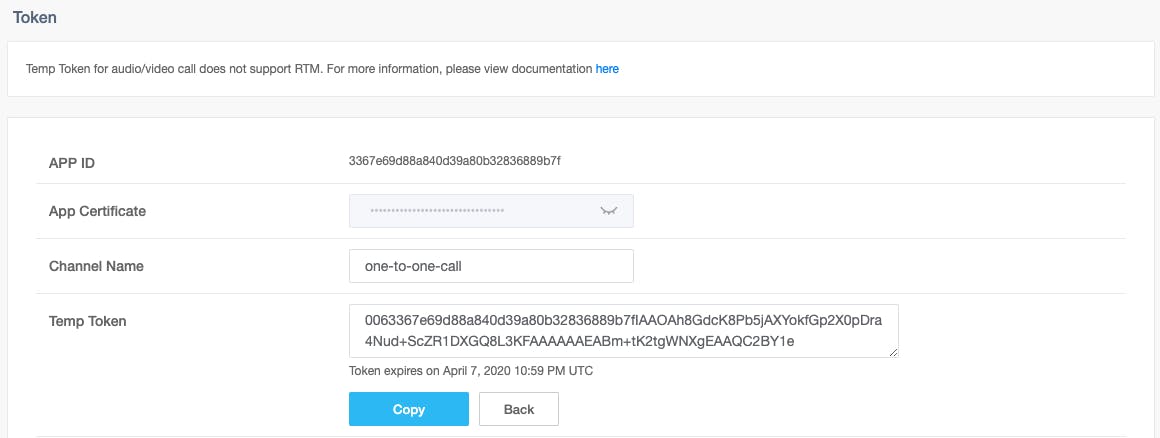
you will the temp token has been generated successfully, now copy the token and the channel name and save them we will use them later 💾
Now go to your Xcode and create single view app and create your UI :

is the local video view
is the remote video view
flip the camera button
end the call button
mute button.
now navigate to info.plist file and add these keys with a message explaining why you want to access the camera and the microphone.
<key>NSCameraUsageDescription</key>

<string>We need to access your camera.</string>

<key>NSMicrophoneUsageDescription</key>

<string>We need to access your microphone.</string>
now navigate your ViewController and lets write some code 💻
first we make 2 IBOutlet for our views and make 3 IBActions for the buttons and link them:
**@IBOutlet** **weak** **var** localVideo: UIView!

@IBOutlet weak var remoteVideo: UIView!


@IBAction func muteIsPressed(_ sender: UIButton) {

}

@IBAction func cancelIsPressed(_ sender: UIButton) {

}

@IBAction func swtichIsPressed(_ sender: UIButton) {

}
now it’s time to add Agora SDK to our project so we will add it using CocoaPods.
pod init
open Podfile
and add the the following line to the podfile:
pod 'AgoraRtcEngine_iOS'
then hit the pod install command :
pod install
now open your xcode workspace and navigate to your ViewController and import Agora SDK with the following line:
**import** AgoraRtcKit
now lets create an instance from AgoraRtcEngineKit , and create 3 variables for the AppID , token , channelID
**var** appID = "Your App ID"

var token = "Your Token"

var channelID = "Your Channel ID"
now we need to initialize Agora-Engine so we will declare a function with the following :
**func** initializeAgoraEngine() {

agoraKit = AgoraRtcEngineKit.sharedEngine(withAppId: appID, delegate: self)

}
and to enable video we will need to call enableVideo function from AgoraKit so we will declare the following function :
**func** setupVideo() {

agoraKit.enableVideo()

}
then we will setup the local video view using the following function :
**func** setupLocalVideo() {

let videoCanvas = AgoraRtcVideoCanvas()

videoCanvas.uid = 0

videoCanvas.view = localVideo

videoCanvas.renderMode = .hidden

agoraKit.setupLocalVideo(videoCanvas)

}
this function will create an AgoraRtcVideoCanvas object for the video stream with the following properties :
uid: A value of 0 allows Agora to choose a random ID for the stream.
view: Set to the localVideo view from the storyboard.
renderMode: Set to hidden to uniformly scale the video until it fills the visible boundaries.
now it’s the time to join a channel :
**func** joinChannel() {

agoraKit.setDefaultAudioRouteToSpeakerphone(true)

agoraKit.joinChannel(byToken: token , channelId: channelID , info:nil, uid:0) { (channel, uid, elapsed) -> Void in

// actions here

}

UIApplication.shared.isIdleTimerDisabled = true

}
in this function we do the following :
tell agoraKit join channel function to join the channel with the token we have declared above , the token we have also declared above and the uid parameter passes the assigned user ID for the user joining the channel. The value of 0 is passed for the uid parameter which allows Agora to auto-assign a random UID for the user that is joining.
The call using agoraKit enables the speakerphone when using Agora
UIApplication.shared.isIdleTimerDisabled disables the application’s idle timer to prevent the application from idling while the app is running.
now it’s time to fill the IBActions we have declared before:
**@IBAction** **func** muteIsPressed(**_** sender: UIButton) {

agoraKit.muteLocalAudioStream(sender.isSelected)

}

@IBAction func cancelIsPressed(_ sender: UIButton) {

agoraKit.leaveChannel(nil)

UIApplication.shared.isIdleTimerDisabled = false

dismiss(animated: true, completion: nil)

}

@IBAction func swtichIsPressed(_ sender: UIButton) {

agoraKit.switchCamera()

}
muteIsPressed: to mute and un-mute the remote call.
canelIsPressed: to hang up the call and set the isIdleTimerDisabled to false and dismiss the current view
switchIsPressed : to switch the camera the rear or the front camera.
Now you will notice that the xcode is complaining about the AgoraRtcEngineKit delegate 🤔
so we need to add AgoraRtcEngineDelegate function:
**func** rtcEngine(**_** engine: AgoraRtcEngineKit, firstRemoteVideoDecodedOfUid uid:UInt, size:CGSize, elapsed:Int) {

self.agoraKit.muteLocalAudioStream(false)

let videoCanvas = AgoraRtcVideoCanvas()

videoCanvas.uid = uid

videoCanvas.view = self.remoteVideo

videoCanvas.renderMode = .fit

self.agoraKit.setupRemoteVideo(videoCanvas)

}
this function do the following :
unmute the audio.
Initializes the AgoraRtcVideoCanvas object.
Sets the uid property to 0 to allow Agora to choose a random UID for the stream feed.
Sets the view property to the remoteVideo view from the storyboard.
Sets renderMode to adaptive to ensure the video is resized proportionally to fit the display window.
Invokes agoraKit.setupRemoteVideo(videoCanvas) passing in the AgoraRtcVideoCanvas object that was just created.
That’s it now go and run your application on your device and on another device to test it out 🔥
and you can see the complete project here : Github.
That’s it hopefully you got it and it was simple and clear for you, if you found this article helpful please leave some claps and share it so everyone can benefit from it too ❤️
Greetings to SwiftCairo & LintSchool ❤️🇪🇬